Installation and Maintenance Best Practices for MoSi2 Heating Elements in Dental Furnaces
Proper installation and maintenance of MoSi2 heating elements can mean the difference between years of reliable service and costly premature failures. These ceramic-based heating elements require specific handling techniques and maintenance protocols that differ significantly from traditional metallic heating elements.
Pre-Installation Preparation
Safety Equipment and Tools:
Essential Safety Gear:
- Heat-resistant gloves (leather or Kevlar-reinforced)
- Safety glasses with side shields
- Anti-static wrist straps for sensitive electronic components
- Non-conductive tools for electrical work
Required Installation Tools:
- Digital multimeter for electrical testing
- Torque wrench for connection terminals
- Insulation resistance tester
- Digital calipers for dimensional verification
- Clean, lint-free cloths for surface preparation
Environmental Preparation:
Clean Work Environment: MoSi2 elements are sensitive to contamination. Ensure the installation area is:
- Free from dust and debris
- Adequately ventilated
- Protected from mechanical vibration
- Maintained at stable temperature and humidity
Furnace Preparation:
- Complete cooling to room temperature (mandatory)
- Thorough cleaning of element mounting areas
- Inspection of electrical connections and insulation
- Documentation of existing element specifications
Handling Procedures for MoSi2 Elements
Critical Handling Rules:
⚠️ Never bend, twist, or apply lateral force to MoSi2 elements. The ceramic material is extremely brittle and will fracture under mechanical stress.
⚠️ Support the entire element length during handling. Unsupported sections can break under their own weight.
⚠️ Avoid temperature shock during storage and handling. Rapid temperature changes can cause thermal stress fractures.
Proper Lifting Technique:
- Two-Person Lift: Use two people for elements longer than 300mm
- Full Support: Support the element at multiple points along its length
- Slow, Deliberate Movements: Avoid quick or jerky motions
- Protected Surfaces: Place elements on soft, clean surfaces during preparation
Step-by-Step Installation Process
Phase 1: Electrical Disconnection and Safety
- Complete Power Isolation: Disconnect all electrical power to the furnace
- Lock-Out/Tag-Out: Implement proper electrical safety procedures
- Verify Zero Energy: Use a multimeter to confirm no electrical potential
- Document Settings: Record existing controller settings and parameters
Phase 2: Old Element Removal
- Photographic Documentation: Take photos of existing element configuration
- Electrical Disconnection: Remove terminal connections (note wire positions)
- Support Structure Removal: Carefully remove element supports and clamps
- Element Extraction: Remove old elements with full support
- Damage Assessment: Inspect furnace interior for damage or contamination
Phase 3: New Element Installation
Dimensional Verification:
- Confirm new elements match specifications exactly
- Verify heated zone length (Le) measurements
- Check terminal spacing (A dimension)
- Validate cold zone length (Lu) dimensions
Physical Installation:
- Support Structure Preparation: Clean and inspect all mounting hardware
- Element Positioning: Place elements in exact OEM positions
- Spacing Verification: Ensure proper clearances between elements
- Mounting Security: Secure elements without over-tightening clamps
Electrical Connection:
Connection Sequence:
- Terminal Preparation: Clean all electrical terminals
- Torque Specifications: Apply manufacturer-specified torque values
- Connection Inspection: Verify tight, clean electrical connections
- Insulation Testing: Test insulation resistance before power application
Furnace-Specific Installation Considerations
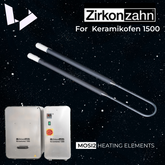
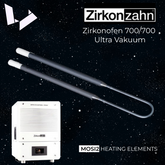
Zirkonzahn Zirkonofen Systems:
Unique Requirements:
- Compact element spacing requires precise positioning
- Fast heating systems need secure terminal connections
- Multiple element types may be used in single furnace
Installation Tips:
- Use provided alignment jigs for element positioning
- Verify element orientation matches heating zone requirements
- Check thermal expansion clearances in compact chambers
Vita Zyrcomat Series:
Special Considerations:
- Large chamber elements require additional support during installation
- Multiple heating zones need careful element identification
- High-power systems require heavy-duty electrical connections
Installation Protocol:
- Install elements in matched sets for uniform performance
- Verify zone-specific element specifications
- Test each heating zone independently after installation
Nabertherm LHT Furnaces:
Installation Characteristics:
- Modular element design simplifies replacement
- Variable chamber configurations require specific element types
- Research-grade systems need precision installation
Post-Installation Testing and Commissioning
Electrical Testing Protocol:
Resistance Measurements:
- Measure and record individual element resistance
- Compare readings to manufacturer specifications
- Verify balanced resistance between multiple elements
- Document baseline values for future reference
Insulation Testing:
- Test element-to-ground insulation resistance
- Verify inter-element insulation integrity
- Check terminal connection insulation
- Record results for maintenance files
Functional Testing:
Heat-Up Test:
- Conduct controlled low-temperature test cycle
- Monitor temperature rise rates and uniformity
- Verify controller response and stability
- Check for unusual sounds, arcing, or odors
Temperature Mapping:
- Use multiple thermocouples to verify temperature uniformity
- Document hot and cold spots within furnace chamber
- Compare results to original furnace specifications
- Adjust element positioning if necessary
Preventive Maintenance Schedules
Daily Operations:
- Visual inspection before each sintering cycle
- Monitor heating performance and consistency
- Check for unusual sounds or electrical issues
- Document any performance anomalies
Weekly Maintenance:
- Inspect electrical connections for signs of heating or corrosion
- Clean furnace chamber of debris and contamination
- Verify temperature controller calibration
- Review performance data for trends
Monthly Evaluation:
- Comprehensive visual inspection of all elements
- Electrical resistance measurements and trending
- Temperature uniformity verification
- Maintenance log review and planning
Quarterly Service:
- Professional electrical system inspection
- Complete furnace calibration verification
- Element replacement planning based on usage data
- Comprehensive performance evaluation
Troubleshooting Common Installation Issues
Element Damage During Installation:
Symptoms: Visible cracks, electrical shorts, or immediate failure upon power application.
Prevention:
- Always use proper handling techniques
- Never force elements into position
- Verify dimensional compatibility before installation
- Use appropriate tools and safety equipment
Response:
- Immediately discontinue installation
- Document damage for warranty/insurance claims
- Replace damaged elements before proceeding
- Review installation procedures to prevent recurrence
Electrical Connection Problems:
Symptoms: Arcing, irregular heating, or high connection resistance.
Causes:
- Inadequate terminal cleaning
- Incorrect torque application
- Contamination in connection area
- Mismatched connection hardware
Solutions:
- Proper terminal preparation and cleaning
- Use calibrated torque wrenches
- Apply appropriate conductive compounds
- Verify hardware compatibility
Environmental Factors Affecting Performance
Humidity Control:
- Maintain low humidity in furnace environment
- Use desiccants in storage areas
- Monitor condensation during temperature cycling
- Implement moisture barrier techniques
Contamination Prevention:
- Regular chamber cleaning schedules
- Proper ventilation during operation
- Contamination source identification and elimination
- Clean handling procedures throughout element life
Vibration Management:
- Secure furnace mounting to minimize vibration
- Isolate furnaces from building vibration sources
- Regular inspection of mounting hardware
- Vibration monitoring in critical applications
Documentation and Record Keeping
Installation Records:
- Element specifications and manufacturer data
- Installation date and personnel involved
- Initial electrical test results
- Photographic documentation of installation
Maintenance Logs:
- Regular inspection results
- Performance trend data
- Maintenance actions performed
- Parts replacement history
Performance Tracking:
- Temperature uniformity measurements
- Energy consumption data
- Element resistance trending
- Failure analysis records
Cost-Effective Maintenance Strategies
Predictive Maintenance:
- Trend analysis to predict element replacement timing
- Preventive replacement before failure occurs
- Bulk element purchasing for inventory optimization
- Maintenance scheduling during planned downtime
Inventory Management:
- Maintain appropriate spare element inventory
- Consider element set replacement strategies
- Negotiate volume pricing with suppliers
- Plan for seasonal demand variations
Training and Competency Development
Personnel Training Requirements:
- Proper handling techniques for ceramic elements
- Electrical safety procedures specific to high-temperature furnaces
- Installation procedures and quality checks
- Troubleshooting and diagnostic techniques
Ongoing Education:
- Stay current with manufacturer updates and improvements
- Attend technical training sessions
- Participate in industry best practice sharing
- Maintain relationships with technical support resources
Proper installation and maintenance of MoSi2 heating elements requires specialized knowledge, appropriate tools, and adherence to proven procedures. The investment in proper installation and maintenance practices pays dividends through extended element life, consistent performance, and reduced unexpected downtime.
By following these best practices, dental laboratories can maximize their investment in high-quality MoSi2 heating elements while ensuring reliable, consistent sintering performance for years to come. Remember that professional installation and maintenance support is available from qualified suppliers and should be utilized when internal expertise is limited.


Leave a comment
All blog comments are checked prior to publishing